Give a Product Photo a Pure White Background
Marketplaces and catalogues want the same thing: the product, centred, on pure white, usually in a square frame. If you already have a cut-out with a transparent background, you do not need a photo studio — you need three operations in the right order: enlarge the canvas to a square, put white behind the product, and centre it.
This article assumes the product is already separated from its background. If it is not, do that first with the magic eraser workflow, then come back; doing it in the other order wastes the cut-out.
Step 1: Read the Current Size
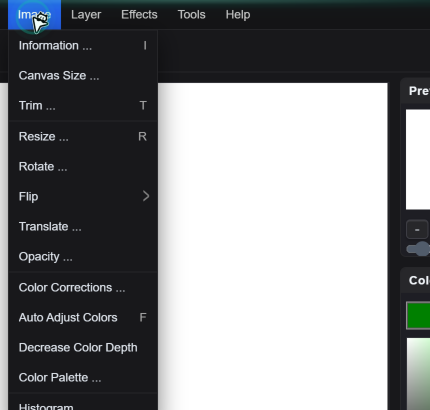
Open the cut-out and check Image → Information. You need the width and height to choose a square that fits without shrinking the product. If the product is 1400 × 1000, a 1600 × 1600 sheet leaves 100 px of breathing room on each side once centred. A 1200 × 1200 sheet would force a resize down, which costs sharpness.
Pick a square at or above the longest edge of your product. Most listings want 1000, 1200, 1600 or 2000 px; anything in that range is safe.
Step 2: Grow the Canvas to a Square
Set Width and Height to the same number. Two settings decide whether this goes well:
In proportion must stay unticked. Ticked, the dialog scales the product along with the sheet, which is a resize and softens the image. Unticked, the product keeps its pixels and only the sheet grows.
Layout stays on Custom unless you want a preset size — the Resolution dropdown carries common presets with a Portrait / Landscape switch.
The canvas grows on the right and bottom, so the product ends up in the upper-left. Do not panic at this stage; the next step fixes it.
Step 3: Put White Behind It
Layer → New creates an empty layer above the product. Drag it below in the layer panel, or use Layer → Move → Down until the product is on top. Set the foreground colour to #ffffff and fill the whole layer with the Fill tool — one click on an empty layer covers it all.
The Fill tool covers the contiguous area under the click. On an empty layer that is the entire canvas, so one click is enough. Painting with a brush along the edges is how people end up with a slightly grey halo — the brush has soft edges, the fill does not.
Step 4: Centre the Product
With the product layer selected, open Image → Translate and shift it by half the extra width and half the extra height. For a 1000 × 1400 product on a 1600 × 1600 sheet: move X by +150 and Y by +50. Dragging on the canvas works too, but Translate lets you type exact numbers, which matters when you are producing ten images that must look like a set.
Leave equal margin on all four sides If the product is symmetrical. If it has a natural shadow direction or a handle on one side, optical centring looks better than mathematical centring: leave a little more space on the heavy side.
Step 5: Optional Soft Shadow
A pure flat cut-out on pure white can look pasted on. Effects → Common Filters → Shadow adds a shadow behind the opaque pixels with Offset X, Offset Y (both −100 to 100), Radius (0–100) and a colour. For a catalogue look, keep it subtle: offset Y around 8–15, radius 10–20, colour black at low visual weight. A heavy shadow is worse than none — it reads as a cheap mock-up.
Apply the shadow to the product layer only, never to the white background layer, or the whole canvas gets a border-shaped shadow.
Step 6: Export
File → Export, type JPG, Quality 90–95. Tick Show file size if the marketplace has a limit; most sit between 1 MB and 10 MB, and Quality 90 on a 1600 px square lands well under 1 MB. Export to PNG only if the listing accepts transparency, which most do not.
Checks Before You Upload
- Sample the background. It should be 255, 255, 255 everywhere. A JPEG at low quality can shift pure white to 254 and some catalogues auto-reject it.
- Look at the cut-out edge at 100%. A white fringe that was invisible on a dark background becomes obvious on white. If you see one, redo the cut-out with a smaller magic eraser power.
- Confirm it is square. Image → Information should show equal width and height.
- Check the product is not touching an edge. Marketplaces crop to their own ratios and will slice the product if it sits flush.
Quick Answers
The white background shows as 254 instead of 255 — will it be rejected?
Some catalogues do check. Pure white only survives if you avoid heavy JPEG compression and avoid repeated saving. Fill with #ffffff on a separate layer, export at Quality 90 or above in one pass, and verify by sampling the exported file. If a platform is strict, export PNG and let it convert.
How much margin should be left around the product?
Roughly 5–8% of the canvas on each side is a safe default: enough that an automatic crop will not clip the product, small enough that the product still fills the frame. Symmetrical products look best mathematically centred; objects that lean or cast a shadow look better with a little extra room on the heavy side.
Do I need to resize before making the canvas square?
Only if the product is larger than the target square. Growing the canvas never resizes pixels, so do Canvas Size first and resize only when the product itself has to become smaller. That way the image is resampled once at most.
Related Tutorials
Take a cut-out PNG, grow the canvas to a square, fill white underneath, centre it with Translate, then export JPG at 90.