PNG vs JPG: Transparency, File Size & Export, Explained
"PNG or JPG?" — choose wrong and your file is either too big to send, too blurry to use, or the transparency you needed turns into ugly white blocks. The whole decision boils down to three sentences. Read on and you'll never hesitate again.
One Image Tells the Story
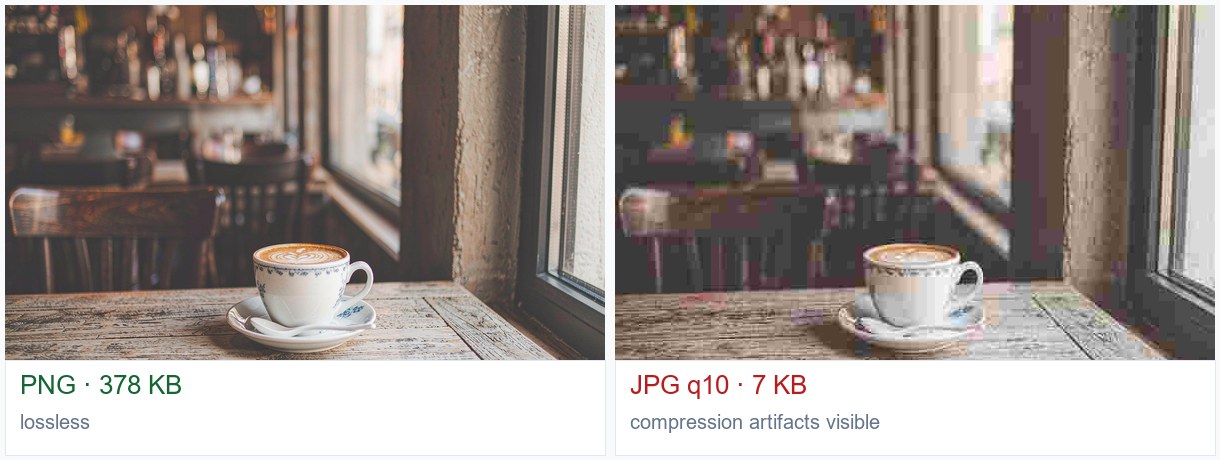
The Decision in Three Sentences
1. Need transparency (cutouts, signatures, stickers) → PNG only; JPG cannot store transparency.
2. Need crisp text or further editing (screenshots, design drafts) → PNG, lossless and re-editable.
3. Just sharing photos (people, landscapes, products) → JPG at quality 85: about 10× smaller, visually identical.
Compression: What Each Format Throws Away
PNG is lossless. Every pixel is stored exactly, then squeezed with a prediction filter plus DEFLATE — the same idea as zipping a text file. Open and re-save it a hundred times and the hundredth file is identical to the first. That is why PNG is the working format for anything you will edit again: screenshots, logos, cutouts, layered exports.
JPG is lossy, and it loses information in a specific, predictable way. The image is split into 8×8 blocks, each block is converted into frequency information, and the high frequencies — fine detail, hard edges, subtle gradients — are quantised away according to the quality setting. Smooth areas compress beautifully. Sharp transitions between two colours do not, which is why text on a JPG develops coloured halos and why a red logo on white turns mushy at the boundary.
The practical consequence is that JPG quality is not a linear dial. From 100 down to 90 the file shrinks fast and looks identical. From 90 to 80 it keeps shrinking and still looks fine on a photo. Below 70 the curve flattens — you save a few percent more and start seeing blocks in skies, banding around lights, and mosquito noise around high-contrast edges. Anyone exporting at 40 to hit a size limit is trading visible damage for a saving they could have got by cropping 10% of the frame instead.
Transparency, and Where It Breaks
JPG has no alpha channel. Export a cutout with a transparent background as JPG and the editor has to fill those pixels with something — usually white, sometimes black, depending on the encoder. The format has no way to represent "nothing here", so the white fill is expected behaviour rather than a glitch.
PNG can, but transparency still breaks in three common places. First, flattening: if you merge a transparent layer onto an opaque background layer before exporting, the transparency is gone before the file is written. Second, indexed colour: reducing to a palette can turn soft anti-aliased edges into a hard, jagged boundary, because the intermediate shades no longer exist. Third, the receiving app: some chat tools and print services put a white background behind a PNG automatically, so a transparent logo looks fine in the editor and boxed in the final document.
One habit avoids all three. Export the transparent asset as PNG, then open the exported file in a viewer that shows a checkerboard background and confirm the transparency survived. Ten seconds of checking beats discovering it after a client upload.
When PNG Is Smaller Than JPG
The usual advice — "JPG is always smaller" — holds for photographs and fails for graphics. A screenshot of a text document, a flat icon, a chart with six colours, a logo on a solid background: these contain large regions of identical pixels. PNG's filter plus DEFLATE pass turns a run of identical pixels into almost no data, while JPG still spends bytes approximating every block edge and produces visible artefacts around every letter.
So the size argument follows the content, not the extension. A 1200×630 banner of flat colour and type can be 40 KB as PNG and 90 KB as JPG at quality 90, with the JPG also looking worse. The same banner filled with a photograph flips completely: 60 KB as JPG, 900 KB as PNG. Look at what is in the image before choosing.
Exporting in the Editor
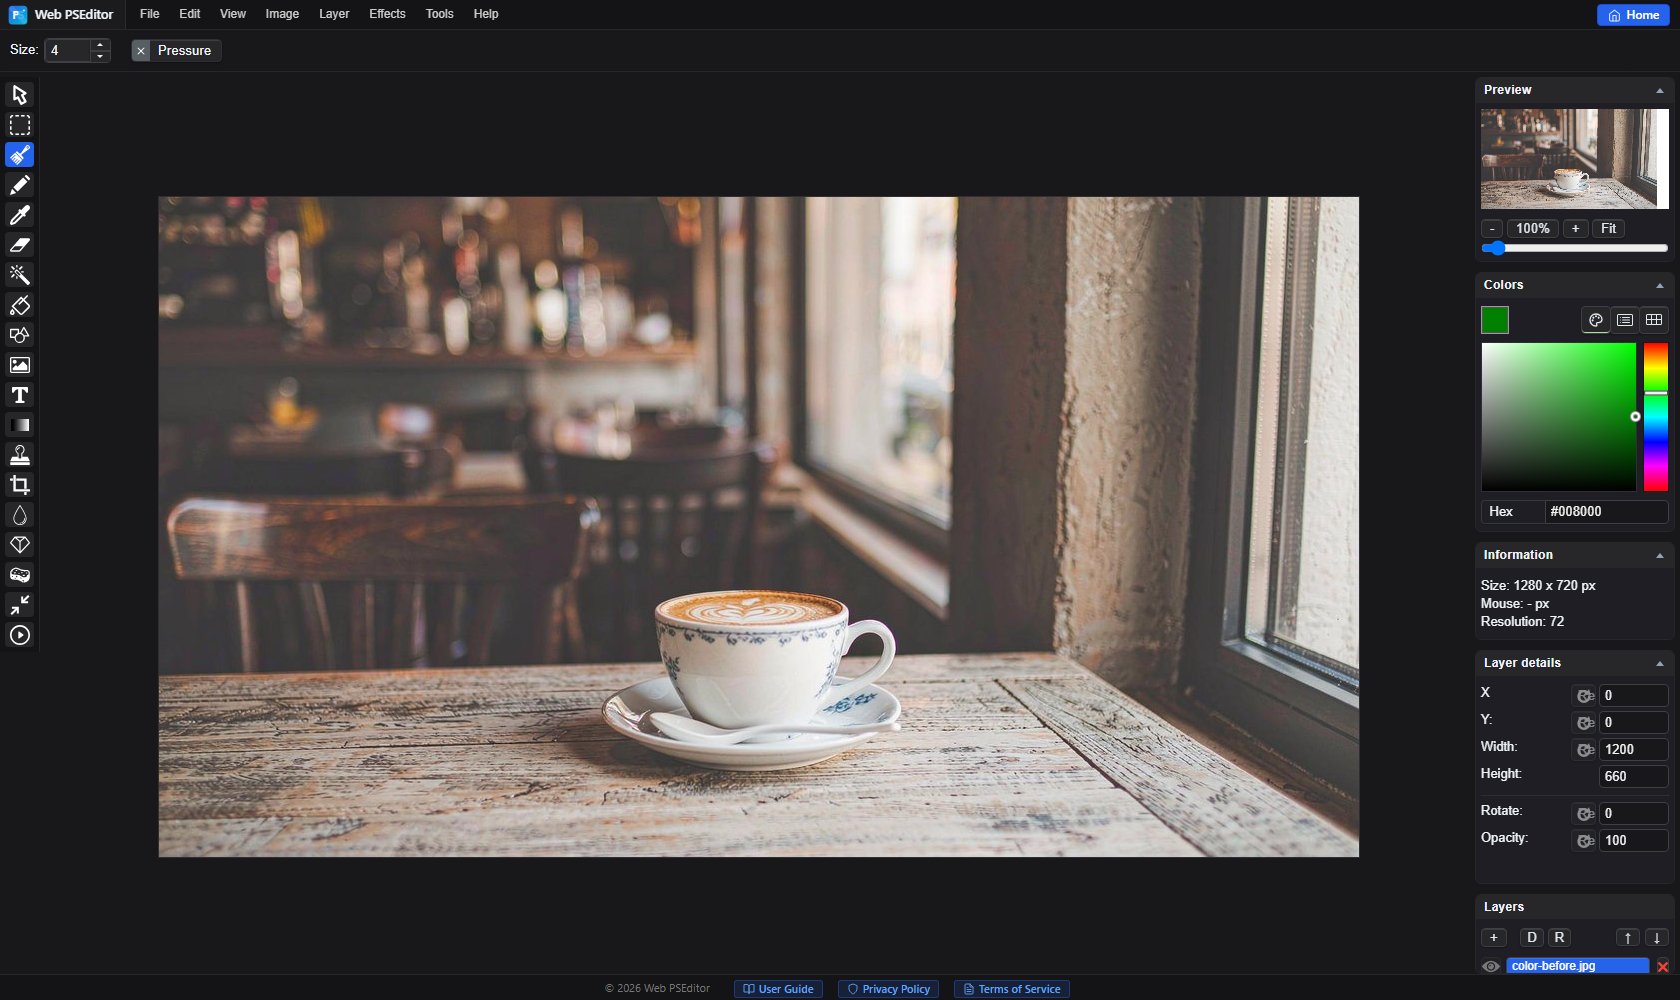
When your edit is done, choose File → Export. The dialog asks for a file name and a Save as type — pick PNG or JPG. (File → Save As stores the editable project, which is a different thing and will not give you a flat image.)
The quality slider defaults to 90 and only appears for lossy formats. Stay in the 85–90 band: near-lossless looks, much smaller files. Below 70 shows visible blocks; above 95 the file balloons with no visible gain, because whatever you upload will be re-encoded by the platform regardless.
Enable Show file size in the dialog and the estimated output size updates as you move the quality slider. This is the fastest way to find the highest quality that still fits an upload limit — drag down until the number clears the limit, then stop. The same panel reports the pixel resolution, which is worth a glance before exporting a resized file.
If the image has transparent areas, only PNG keeps them. Leave the layers unmerged unless you intend to flatten, and do not place an opaque background layer underneath at the last minute — that silently removes the alpha channel you spent time cutting out.
Quick Answers
What JPG quality setting should I export a photo at?
85 to 90 for photographs. At 85 the difference from the original is invisible at normal viewing size and the file is roughly a tenth of the PNG. Going to 95 or 100 adds bytes your platform will discard when it re-compresses the upload anyway. Below 70 the blocking artefacts start showing in smooth skies and skin.
Which format keeps small text sharpest?
PNG. JPG splits the image into 8×8 pixel blocks and approximates each one, so thin strokes pick up ringing and coloured fringes along their edges even at high quality settings. Screenshots, charts, slides and anything with type should be PNG, or the text will look dirty before it is printed or read.
What is the smallest PNG I can make?
Reduce the number of colours first, then the dimensions. A flat graphic with a dozen colours can be a few kilobytes at full size, because PNG stores repeated pixels efficiently. A photograph cannot be squeezed the same way: it holds thousands of colours, and shrinking the palette produces banding in gradients rather than a smaller file.
Related Tutorials
Open the editor and export the same image as PNG and JPG to compare.