How to Cut Out an Image & Export a Transparent PNG
A cutout is not one operation, it is two: get rid of the background, then make sure the pixels you removed stay removed. Most failures happen in the second part — the subject looks isolated on the canvas, and the exported file comes back with a white box around it. This guide covers both, using the three tools this editor actually has.

The Three Tools That Do the Work
There is no lasso and no polygon tool in the toolbar, which is fine for most cutouts. What you have is enough:
| Tool | Best for | What it actually does |
|---|---|---|
| Magic Eraser Tool | Solid or near-solid backgrounds: product shots, studio portraits, flat scans | Removes every pixel within tolerance of the one you click. The Power field sets the tolerance, default 15, range up to 100. |
| Selection tool | Straight edges, boxy products, anything you can frame with a rectangle | Drag a rectangular selection, then Edit → Delete Selection to remove what is inside. |
| Eraser | Leftover specks, halos, the last bit of background around a strap | Paints transparency. Set the brush size small and zoom in; this is the manual finish. |
Drag the file onto the canvas or use File → Open. Confirm the layer is selected in the right-hand panel — every tool below acts on the selected layer only.
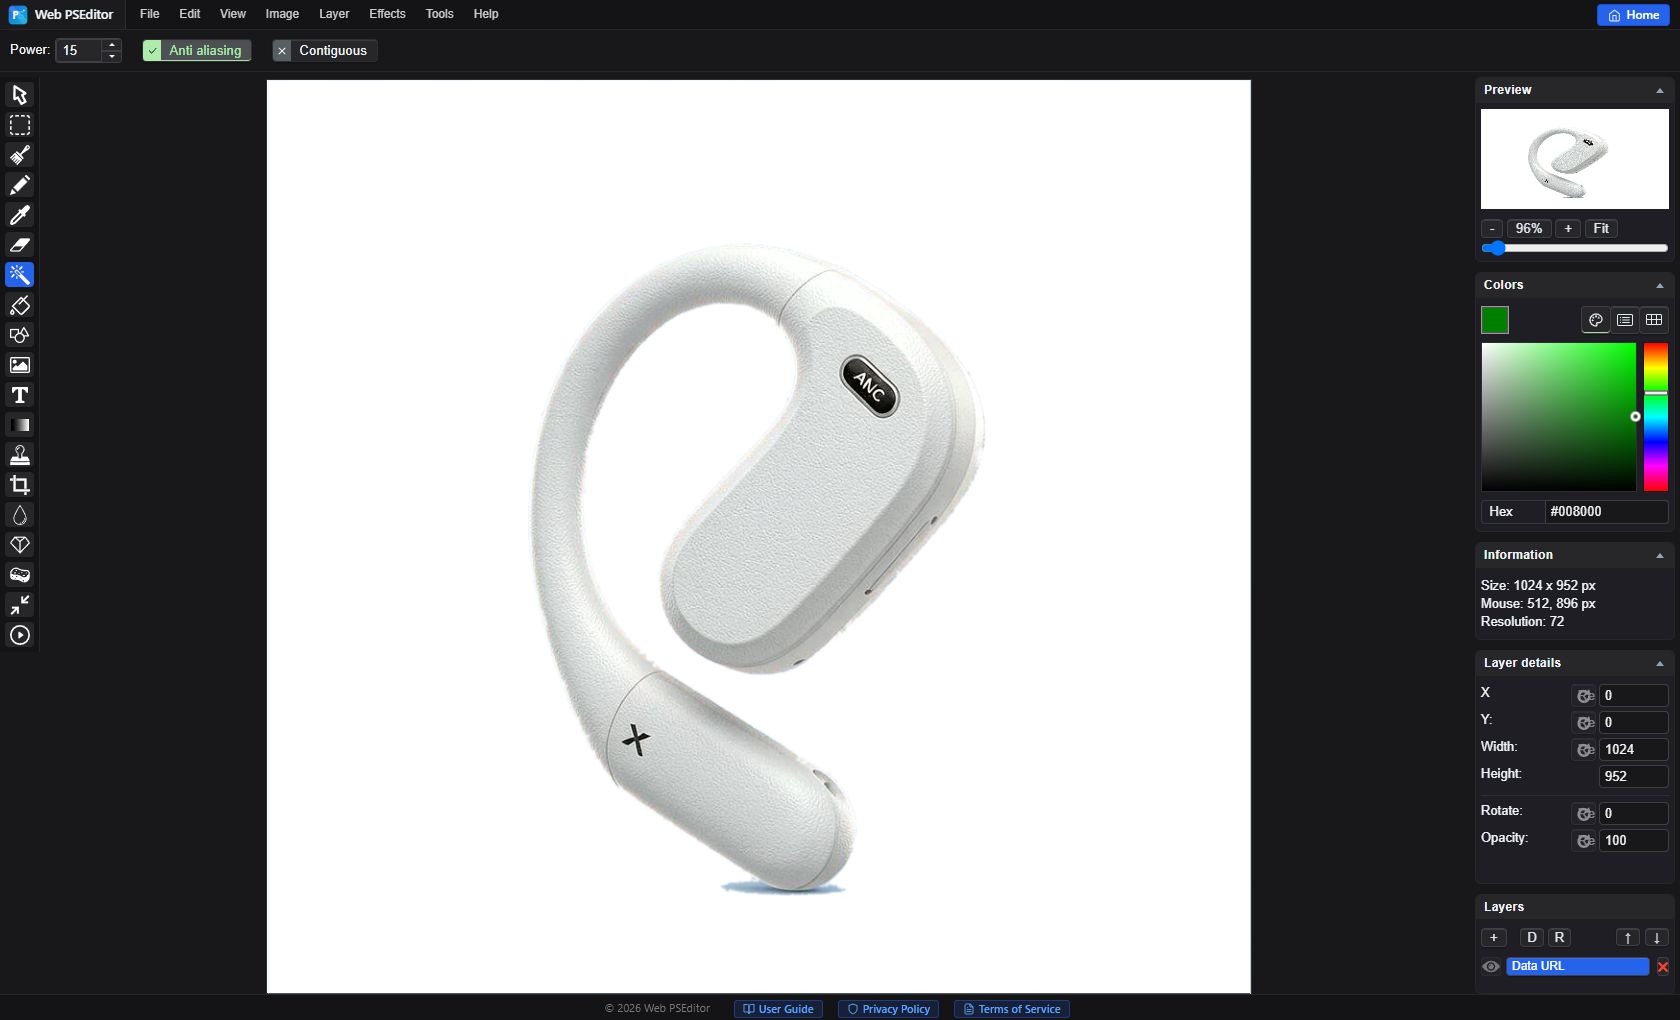
Pick the Magic Eraser Tool from the left toolbar and click once on a flat area of background. Every pixel within tolerance of the sampled colour becomes transparent, and the checkerboard behind the canvas is how you know it worked.
Two settings decide whether that click is clean or destructive. Power is the colour tolerance: at the default 15 it removes near-identical pixels only, and on a background with lighting falloff you will need 25–40 to catch the darker corners. Contiguous is off by default, which means the erase is not limited to the connected region — it removes matching colour anywhere in the layer. On a white-background product that is exactly what you want. On a photo where the subject contains the same colour as the background, it will punch holes through the subject, so check the subject before you click and lower Power if it does.
This editor has no feather command, so the soft edge you are used to from desktop software has to be built another way. In practice:
1. Leave anti-aliasing enabled on the Magic Eraser — it softens the boundary by a pixel, which is most of the benefit a 1 px feather would give you.
2. For a stubborn halo, drop Power to 10–12 and click the fringe again rather than raising it. Raising tolerance eats into the subject; lowering it and clicking twice keeps the edge.
3. Switch to the Eraser at a small brush size and work along the outline at 200% zoom. Slow, but it is the only way to clean hair, straps and transparent edges.
4. If a piece of the subject was removed by mistake, Ctrl + Z undoes it — the erase is one action, not a brush stroke.
Use File → Export and choose PNG (or WebP). JPG has no alpha channel: transparency is filled with white when the file is encoded, which is the single most common reason a cutout "loses" its background after export. If the project is still open, the canvas will keep showing the checkerboard and hide the problem — always reopen the exported file to confirm.
Why Hair and Glass Are Hard
The Magic Eraser works on colour similarity, so it does well on a hard edge and badly on a soft one. Hair strands are a mix of subject and background colours at every pixel; a tolerance low enough to preserve the strands leaves a halo of background, and one high enough to clear the halo eats the strands. Glass, smoke and reflections have the same problem in reverse: parts of the "background" you want gone are actually visible through the subject.
For these subjects the realistic workflow is the Eraser at a small size, at 200–400% zoom, working in short strokes along the edge. It takes minutes rather than seconds. If the cutout is for a large print or a client, that time is the difference between a clean silhouette and a fringe that shows at every size.
Check Before You Export
- Zoom to 200% along the whole outline. A halo is invisible at fit-to-window and obvious at full size.
- Put the cutout on a dark background. Add a temporary dark layer underneath: white fringes that vanish on white become visible immediately.
- Reopen the exported PNG. Confirm the checkerboard survived, then delete the temporary layer.
- Name the file by use.
headphones-cutout-2000px.pngbeatsfinal2.pngwhen you need it again in six months.
- Exporting as JPG — the alpha channel is discarded and the background turns white. Choose PNG or WebP.
- Flattening before export — merging onto an opaque background layer removes the transparency before the file is written.
- Power raised to fix one corner — a high tolerance that clears the corner also bites into the subject. Fix corners with extra clicks at low Power instead.
Quick Answers
What Power value should I start with?
Leave it at the default 15 for a clean studio background, and raise it in steps of five only where the background has a gradient or a shadow. Above about 50 the eraser starts treating the subject's mid-tones as background. If you need more than that, the background is too uneven for a one-click cutout and the Eraser is the faster route.
Why did the background come back white after export?
The file was saved as JPG. JPG cannot store transparency, so the encoder fills the alpha channel with white — the cutout itself was fine. Re-export as PNG or WebP from the still-open project; if the project was closed, redo the cutout, because the JPEG has already flattened the empty pixels into white ones.
How do I keep a soft shadow under the product?
Click the background at a low Power so only the flat colour is removed, and stop before the shadow. Then either leave the shadow on the layer, or select it with the Selection tool, cut it to a new layer, and lower that layer's opacity. A shadow that keeps its gradient reads as a real surface; a hard-edged one looks pasted on.
Related Tutorials
Cut out one product, place it on a dark layer at 200% zoom to check for halos, then export PNG and reopen the file.