Extend a Photo’s Background Instead of Cropping It
You have a vertical shot and need it horizontal — a banner, a thumbnail, a slide. Cropping to 16:9 cuts the subject's head off. Stretching makes everyone wide. There is a third option: keep the subject where it is, grow the canvas sideways, and rebuild the missing strips from the pixels that are already there.
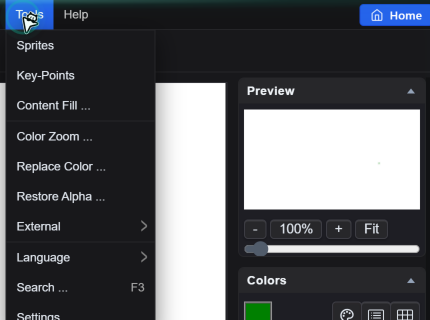
Tools → Content Fill does that rebuild. It requires one condition the editor enforces: the image layer must be smaller than the canvas, which is exactly the state you are in after growing the canvas.
Step 1: Grow the Canvas, Keep the Pixels
Untick In proportion so the layers do not scale. Set the new width for the target ratio: a 1200 × 1500 photo (4:5) becomes 1920 × 1500 for a 16:9-ish banner; 1080 × 1350 becomes 1080 × 1350 → 1920 × 1350 if you want a wide social crop. The extra space appears on the right, so the subject stays anchored left.
Confirm the image layer is still selected and that it no longer fills the canvas. If Content Fill is invoked while the layer covers everything, it refuses with a message that the image already takes the whole area — that refusal is the tool telling you the canvas has not been grown yet.
Step 2: Pick a Fill Mode
| Mode | What it does | Best for |
|---|---|---|
| Expand edges | Stretches the pixels along the layer border outward | Plain backgrounds: sky, wall, studio grey, gradient |
| Cloned edges | Samples small patches from the edge and repeats them | Textured backgrounds: grass, gravel, foliage, fabric |
| Resized as background | Scales a blurred copy behind the original | Busy backgrounds where any invented detail would look wrong |
All three have a live preview, so switch between them and watch the seam before committing. The seam is what matters: a mode that looks great in the middle of the empty strip but leaves a visible vertical line at the layer boundary is the wrong mode for this photo.
Step 3: Tune the Numbers
- Blur power (1–20, default 5) softens the generated area. Higher hides repetition; too high and the extension looks out of focus compared with the real photo.
- Horizontal blur and Vertical blur (0–30 each, default 5) control smoothing along each axis. When extending sideways, vertical blur does most of the visible work — it blends the repeated patches into each other.
- Clone count (10–50, default 15) applies to the cloned-edges mode: how many sample patches get reused. More patches means more variety and less obvious repetition, at the cost of a busier texture.
Judgement is easiest at 100% zoom on the seam itself, then at fit-to-window to check that the eye is not drawn to the join. If you can see where the original ends without looking for it, raise Blur power by 2–3 and lower Clone count.
Step 4: Fix What the Fill Cannot Know
Content Fill only uses pixels near the edge. It cannot continue a horizon line, a road, a wall corner or a pattern that changes direction. Those need manual repair:
Right-click to set a source point, then paint with the Clone tool to continue a horizon or a straight edge into the new area. Work in short strokes and reset the source often; one long stroke drags a visible band of the same pixels across the image.
A solid studio background only needs the Fill tool with the sampled colour. A gradient needs the Gradient tool dragged in the same direction as the original light falloff. Both are faster and cleaner than any automatic extension.
Where It Breaks Down
- High-frequency detail. Brickwork, text on a sign, a crowd — repeated patches look like a copy-paste pattern at a glance.
- Strong perspective. A wall receding to a vanishing point has edges that converge; extending it sideways produces parallel lines instead.
- Shadows with direction. A duplicated shadow strip creates a second, impossible light source.
- Faces. Never extend into a region where a face or a hand is cut off at the edge; the fill will sample skin and smear it.
Ratio Cheat Sheet
Starting from a 3:2 photo at 1800 × 1200: 16:9 needs 2133 × 1200, 4:5 needs 960 × 1200, 1:1 needs 1200 × 1200. Starting from a 4:5 photo at 1200 × 1500: 1:1 needs 1500 × 1500, 16:9 needs 2667 × 1500. Grow first, fill second, and never resize the layer in between.
Quick Answers
Content Fill says the image already takes the whole area. What now?
That means the canvas has not been grown yet — the tool only fills the gap between the layer edge and the canvas edge. Use Image → Canvas Size with In proportion unticked to add the space first, keep the image layer selected, then run Content Fill.
Which mode should I pick?
Expand edges for flat backgrounds such as sky, studio grey or a wall. Cloned edges for texture such as grass, gravel or fabric, where repeating small patches reads as natural. Resized as background when the surroundings are busy and any invented detail would look wrong.
Can I extend a photo that has a horizon in it?
Yes, but the automatic fill will not continue the line — it only samples near the edge. Fill first, then use the Clone tool with short strokes and a frequently reset source point to carry the horizon into the new area. Check the join at 100% zoom.
Related Tutorials
Take a vertical photo, grow the canvas to 16:9, then compare expand-edges against resized-as-background on the seam.