Change a Product Colour in a Photo
You sold the same mug in five colours and only shot one. Or the sample arrived in the wrong shade. Recolouring a product photo is one of the few jobs where a browser editor genuinely earns its place, provided the object is a fairly uniform colour and the lighting is not wildly uneven.
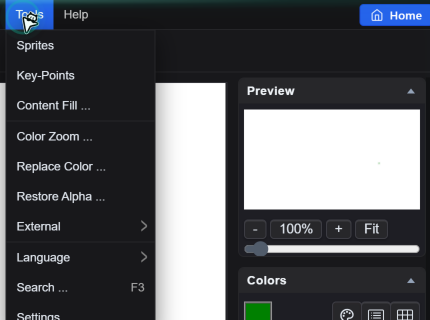
Tools → Replace Color takes a Target colour, a Replacement colour, a Power tolerance, an Opacity and a Mode. That is a small set of controls, and most of the quality comes from two things you do before touching them: sampling the right hex, and choosing an object that can survive the swap.
Before Replacing: Get the Real Colour
Use the Pick color tool (the eyedropper on the left toolbar) on a mid-tone area of the object — not a highlight, not a shadow. Highlights are washed toward white and shadows toward black; both give a hex that is not the product colour, and the replacement will then look wrong across the whole surface.
Duplicate the layer first (Layer → Duplicate) and run Replace Color on the copy. If the result is close but not right, you can erase parts of the copy instead of undoing the whole operation.
The Five Controls
| Control | Range / default | What it decides |
|---|---|---|
| Target | Current foreground colour | Which colour is being replaced. Set it by sampling, not by guessing a hex |
| Replacement | #ff0000 default | The new colour. Enter the exact brand hex if there is one |
| Power | 0–255, default 20 | Tolerance. Higher catches more shades around the target — and more of the background |
| Opacity | 0–255, default 255 | Alpha of the replacement. Leave at 255 for a normal swap; lower values let the layer underneath show through |
| Mode | Advanced / Simple | Advanced preserves more of the original luminance variation; Simple flattens toward the replacement |
Start with Power at 10 and climb in steps of five. A low value leaves a rim of the old colour where the object curves away from the light; a high value starts eating the background and neighbouring objects. The right number is the point just before the background shifts.
Worked Example: Blue Mug to Terracotta
- Sample a mid-tone of the mug's body with Pick Color. Note the hex.
- Duplicate the layer. Select the copy.
- Tools → Replace Color: Target = the sampled hex, Replacement = the brand terracotta, Power = 10, Mode = Advanced.
- Confirm, inspect at 100%. If the handle still has a blue rim, undo and retry at Power 20.
- Check the reflection on the table and the background near the mug's edge — that is where an over-high Power shows itself.
Why a Swap Looks Fake
- Luminance is preserved but hue is not. A dark blue object replaced with a light yellow keeps its dark shading, which reads as a dirty yellow. For large hue jumps, brighten afterwards with Image → Color Corrections.
- Coloured reflections remain. A blue mug casts a blue tint onto the white table. The object changes, the spill does not, and the eye notices the contradiction immediately.
- Power too high. Shadows and highlights on the object sit far from the sampled hex, so they are untouched while the mid-tones change — leaving a mismatched rim.
- Textured surfaces. Wood, denim or brushed metal contain many shades; a single target replaces some of them and leaves streaks of the original.
- Patterns and logos. Anything printed on the object will either be recoloured with it or excluded, and both look wrong.
When to Use a Different Approach
If the object is already isolated on a transparent or plain background, a cleaner route is: select the object, fill a new layer with the target colour, and set that layer's Composition mode to Multiply or Color. That keeps every bit of shading and gives you a single swatch to change later — the technique covered in the layer blend modes guide.
If the surface is textured, or the object has to keep a printed label, the honest answer is that no automatic replacement will look right. Reshooting in the right colour takes ten minutes; repairing a bad swap takes longer and still looks like a swap.
Quick Answers
Why does the recoloured object look dirty or muddy?
Because the replacement changes hue but keeps the original luminance. A dark object turned light-coloured keeps its dark shading, which reads as mud. After replacing, use Image → Color Corrections to lift brightness, or use a blended colour layer (Multiply or Color) so the shading is applied to the new hue instead of replacing it.
What Power value should I use?
Start at 10 and raise it in steps of five until the old colour disappears from the curved edges, then stop one step earlier. If the background or a neighbouring object starts shifting, you have gone past the right tolerance.
The background near the product still has a colour cast. How do I fix it?
That is coloured spill — light bouncing off the product onto the table. Replace Color on the product does not touch it. Select the background area separately and either desaturate it with Image → Color Corrections or shift its hue toward neutral, so the cast matches the new product colour.
Related Tutorials
Recolour one uniform-coloured object twice: once at Power 10 and once at 60, and note where the background starts to drift.